

Templates
Start from a ready-made setup of tables and workflows
A template sets up a table and a workflow for you, so you start from something that already works instead of a blank canvas. Workflows from a template are saved as drafts: nothing is published, and nothing is posted, until you publish the workflow yourself.
Use a template
- Open the Templates page, which anyone can open without an account. In the app, Resources → Templates at the bottom of the sidebar and the Start from a template card on an empty dashboard lead there too.
- Pick a template.
- Click Use template. If you're not signed in, the button reads Sign in to use: sign in, and you're brought back to the template to click Use template.
- Follow the setup checklist that appears.
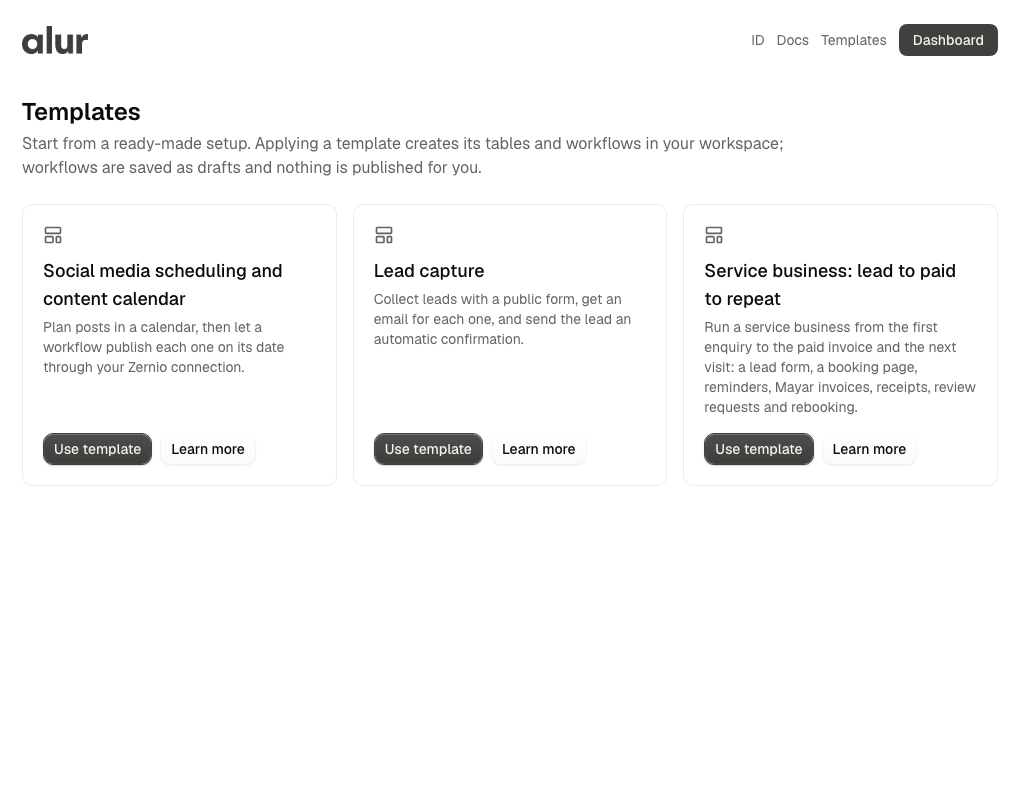
Nothing is set up until you click Use template while signed in. Applying a template is all or nothing: if anything can't be created (for example you already have 20 tables), nothing is created and you're told why. You can apply the same template again; the new copy gets a number, like Content calendar (2), and your existing one is left alone.
Social media scheduling and content calendar
Plan your posts in a table and let a workflow publish each one on its date.
Set it up
After applying, a checklist guides you:
- Connect Zernio on the Connections page, if you haven't. See Zernio.
- Choose your social accounts: open the workflow, click the Publish the post step and tick the accounts to post to, then save. (The step is a Posting step; its text and images come from the row.)
- Publish the workflow so the schedule starts running.
- Set a post's Status to Scheduled and give it a Publish date to have it go out.
What it creates
- A table Content calendar with these columns: Name (the post's title), Post text, Publish date, Status (Draft, Scheduled or Posted), Platform notes and Media (up to 10 images from your Media library). Use the table's Calendar view to see posts by day and the Board view to move them between statuses.
- Optionally, three sample posts with dates over the next few days. They are all Draft, so they are never posted. Untick Include sample posts to start with an empty table.
- A workflow Publish scheduled posts, saved as a draft. It runs every hour from 9:00 to 17:00 in your browser's timezone. Each run looks for the oldest row whose Status is Scheduled and whose Publish date is today or earlier, publishes its text and images, and then sets its Status to Posted. If nothing is due, the run does nothing.
Good to know
- One post is published per run, so at most 9 a day with the default schedule. If several posts are due, they go out over the following hours. You can change the schedule in the trigger step.
- Posts due on an earlier date that were not published (for example the workflow was off) are picked up by the next run.
- If publishing a post fails (for example an account was disconnected), that run fails and the row stays Scheduled, so the next hour tries it again. Check the failure under the workflow's runs. There is no Failed status.
- The template needs a Media column for images; a post without images publishes text only.
Lead capture
Collect leads with a public form, get an email for each one, and send the lead a confirmation. The full walkthrough is in Lead capture.
Set it up
- Share your form (copy its link from the setup screen).
- Connect Resend on the Connections page. If you have exactly one Resend connection, it is already chosen in both workflows.
- Set the From address in each workflow's Send email step: an address on a domain you verified in Resend. It is left empty on purpose.
- Publish both workflows.
Nothing is published and no email is sent until you do. The email texts are plain and meant to be edited; the Form trigger lists the values you can use.
What it creates
- A table Leads with Name, Email, Phone, Message and Status (New, Contacted, Won, Lost).
- A form Contact us on it, live straight away. Visitors give a name and an email (both required), and optionally a phone number and a message. Status is yours: it isn't on the form.
- A workflow Notify me of a new lead, saved as a draft. When the form is submitted it emails you (at your account's email address) through Resend.
- A workflow Confirm to the lead, saved as a draft. When the form is submitted it emails the visitor a thank-you.
Service business
Run a service business from the first enquiry to the paid invoice and the next visit. The full walkthrough is in Service business: lead to paid to repeat.
Set it up
- Share your contact form (copy its link from the setup screen).
- Set your hours and share your booking link (open the link).
- Connect Resend and Connect Mayar on the Connections page. If you have exactly one of each, it is already chosen in the workflows.
- Set the From address in every email step, add your review link to the review email, and check the Mayar connection in Invoice served bookings.
- Publish the nine workflows.
- After each visit, fill in Service, Phone and Price on the visit in the Visits table and tick Served.
Nothing is published, sent or billed until you publish the workflows.
What it creates
- A table Leads and a form Contact us on it, as in Lead capture.
- A link Appointments and a table Visits (one row per booking) with extra columns for the money side: Phone, Service, Price, Served, Invoiced, Invoice ID, Payment link, Paid, Review sent, Next visit and Rebook sent.
- Nine workflows, saved as drafts: Notify me of a new lead, Reply to the lead with the booking link, Email booker: booking confirmed, Add the booking to Visits, Remind tomorrow's bookings, Invoice served bookings (a Mayar invoice, emailed as a payment link), Record the payment (marks the visit Paid and emails a receipt), Ask for a review and Invite them back.